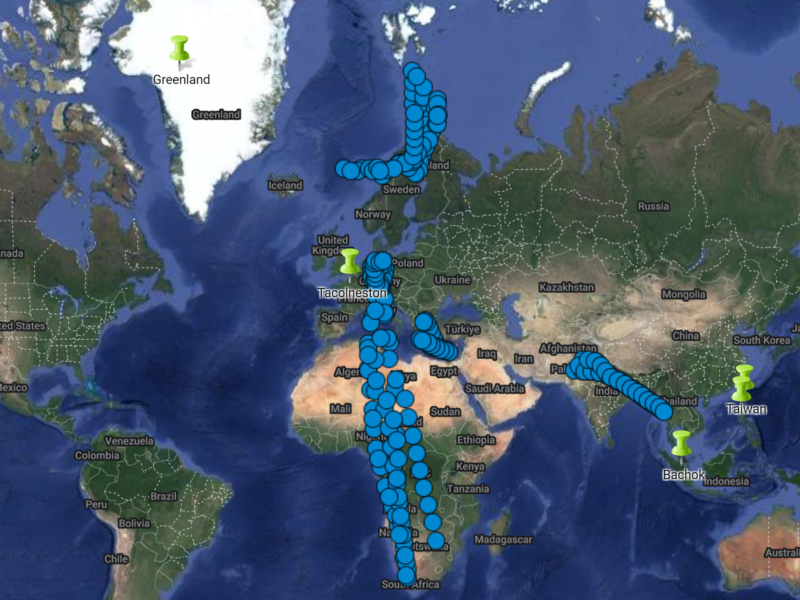
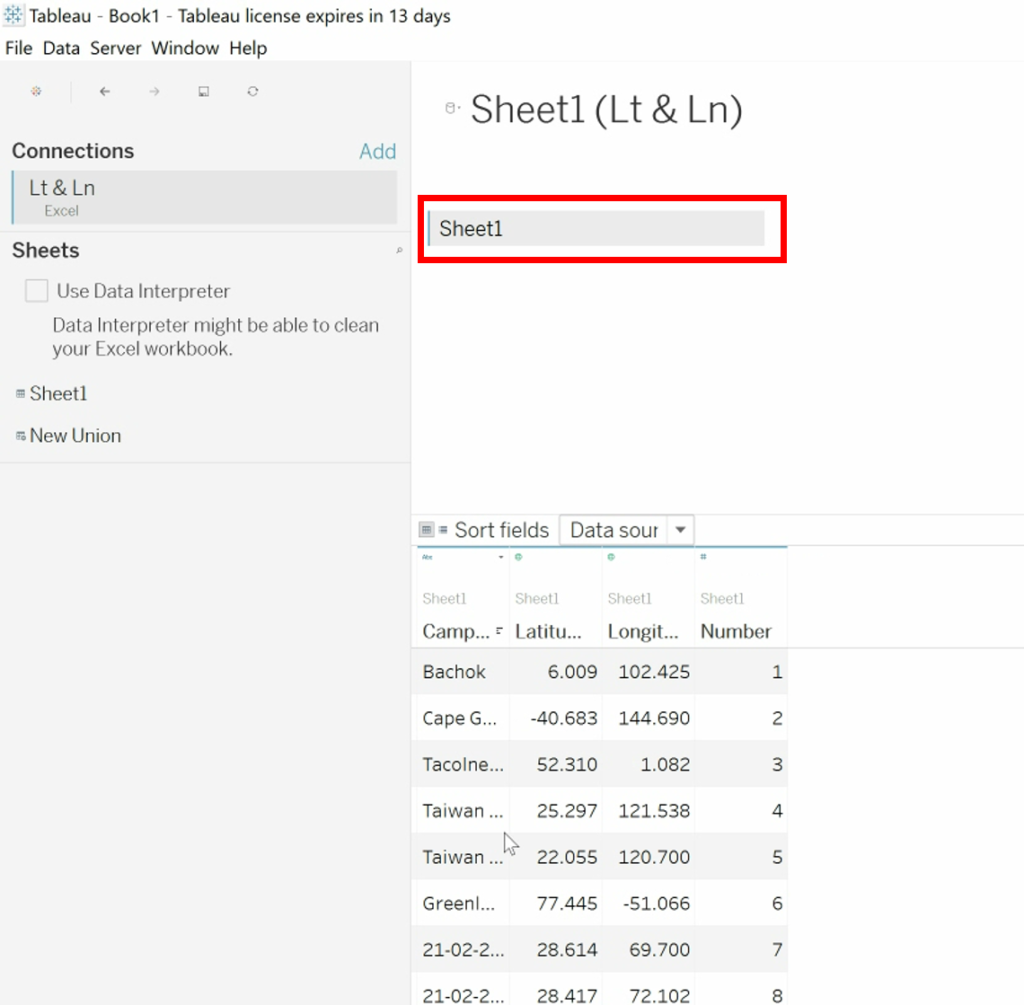
In this example, I have an excel spreadsheet with longitude and latitude coordinates of the locations where 247 air samples were collected during multiple research campaigns. I’m going to plot these on a map using a piece of software called Tableau. You do have to pay for this software, but you can get a free trial.

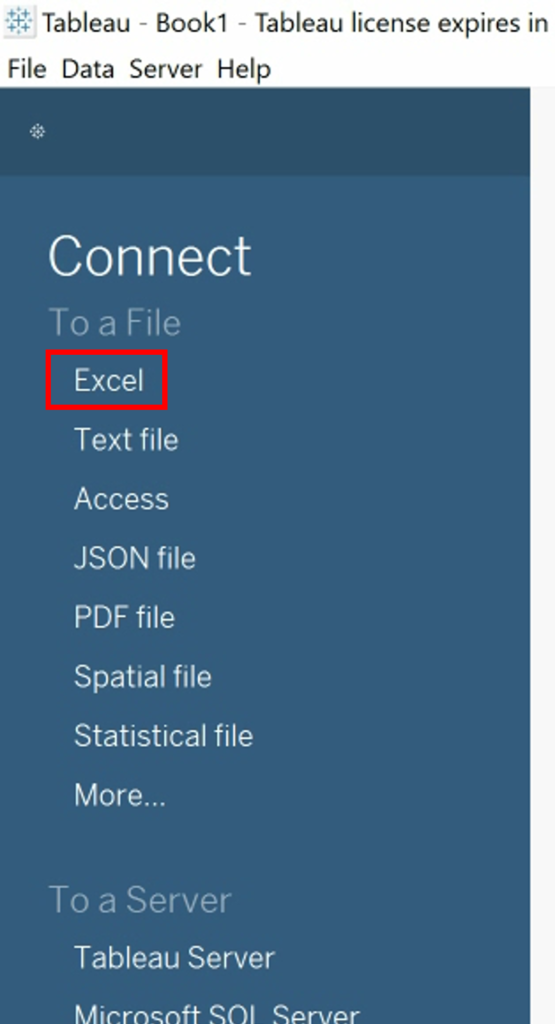
Connect Tableau to the excel file with the longitude and latitude coordinates.
This creates a table in Tableau with the data from the excel spreadsheet. Click on Sheet1.
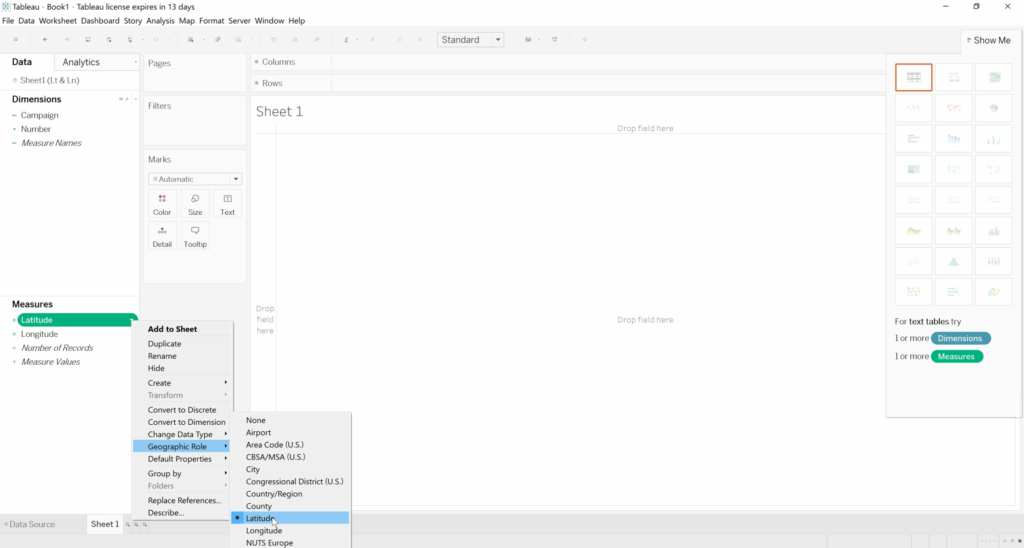
This opens the page where you can create the data visualisation. If you have used Latitude and Longitude as your column headings, Tableau is smart enough to work out what data type these need to be. If not, in the Measures section click on your latitude and longitude column headings, and go to Geographic Role and select either Latitude or Longitude.
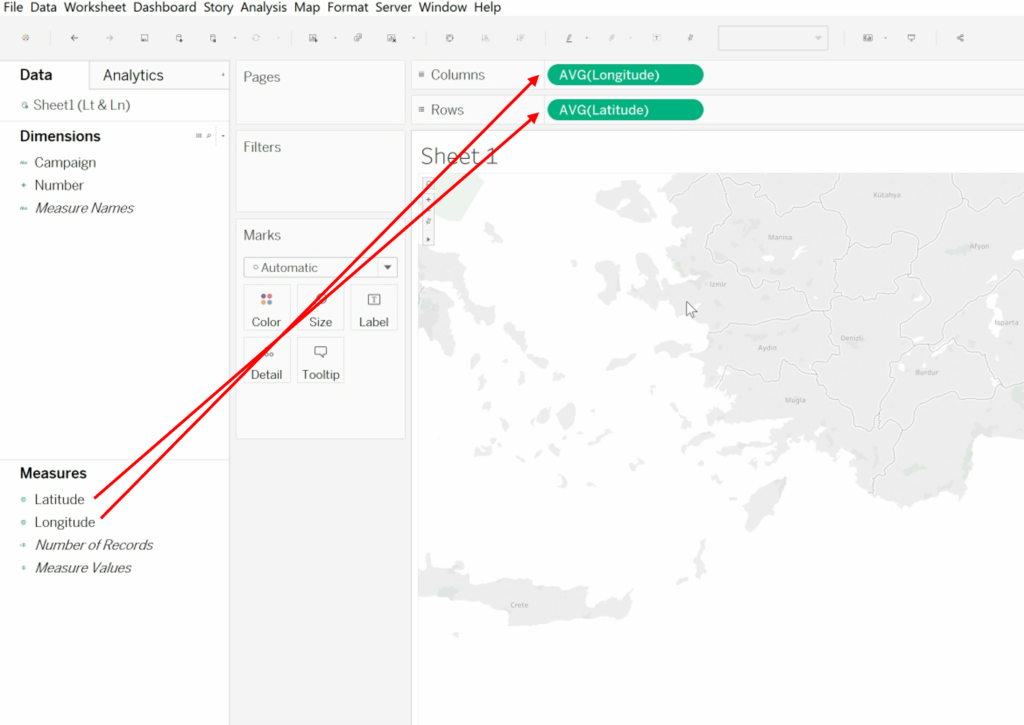
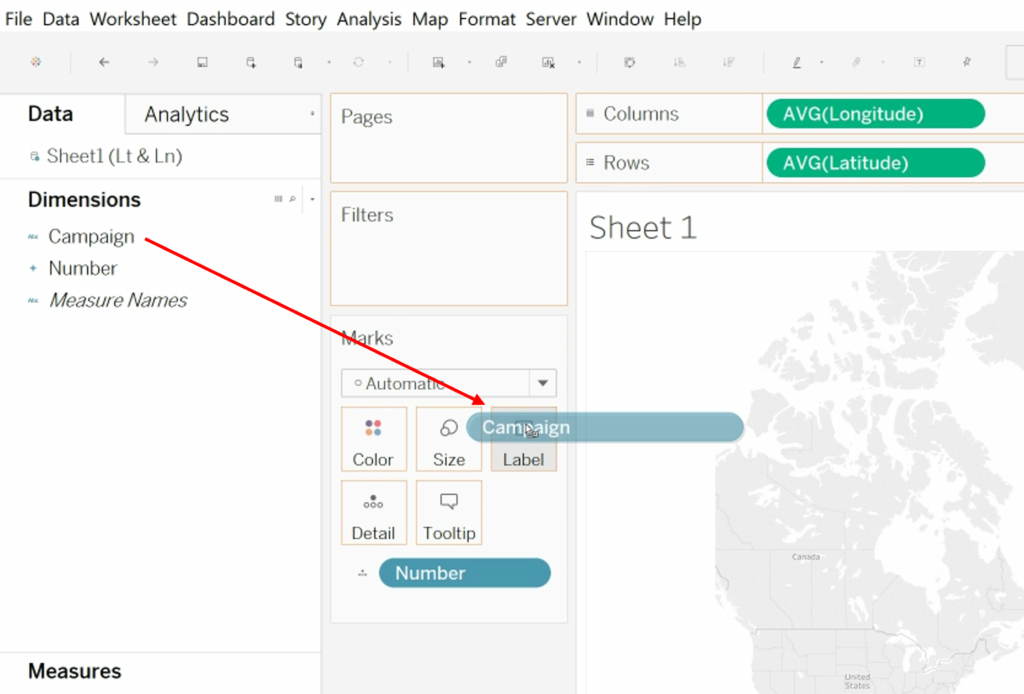
Click and drag, Latitude into the Rows field and Longitude into the Columns field. This will make the map.
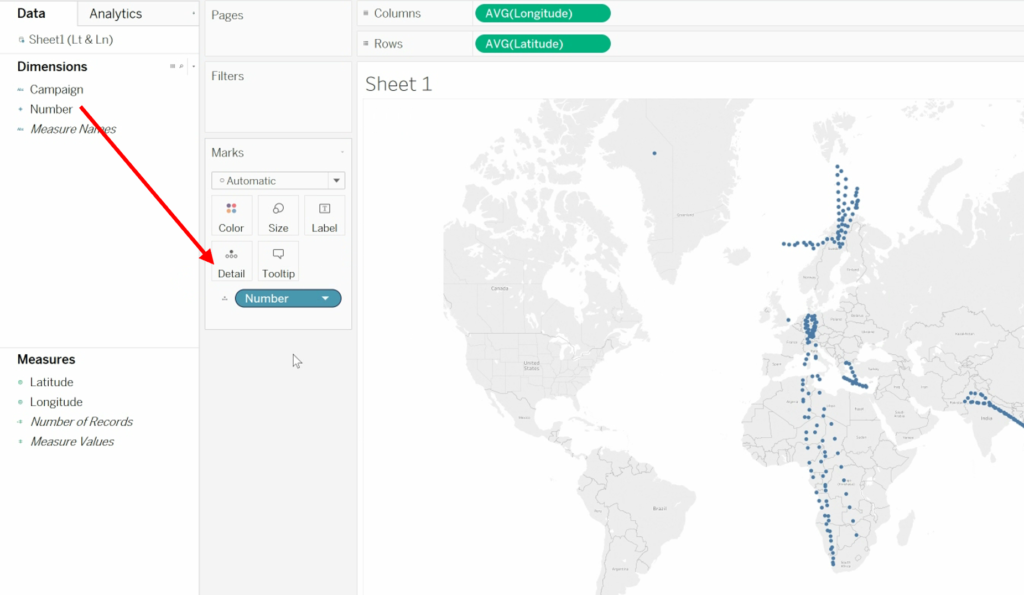
To get it to actually plot the data points, in the Dimensions section, click and drag the column heading for your values. If you don’t have “values” make an extra column in your excel spreadsheet with the number one repeated in every row, you just need something in order to get it to plot.
The appearance of the data points can be changed using the Color and Size options. You can also add data labels to your points. In this example, the data labels are in a column called Campaign, so I will click and drag Campaign into the Label section.
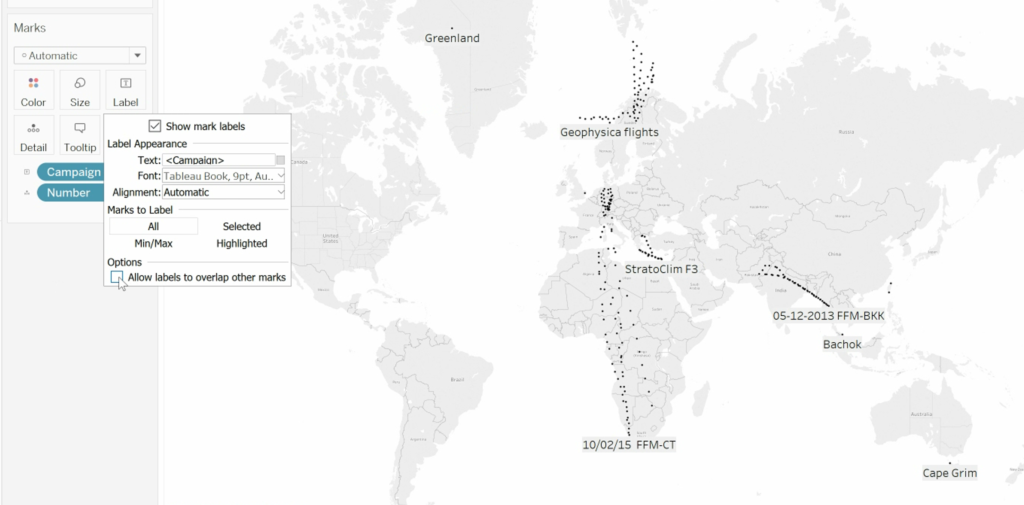
The default option is to not show data labels that overlap each other. You have multiple options for changing how the data labels look.
To change how the map looks, go to Map and then select Map Layers…
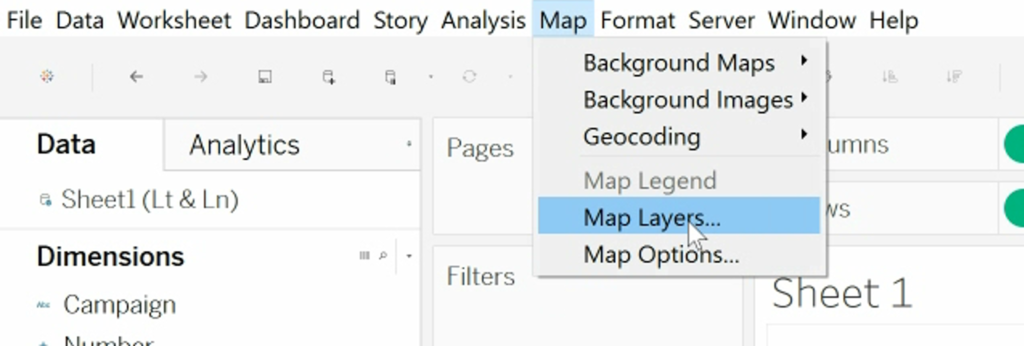
This opens a checklist on the left, to control what is included on the map. For example, I have removed all the country labels and boundaries.

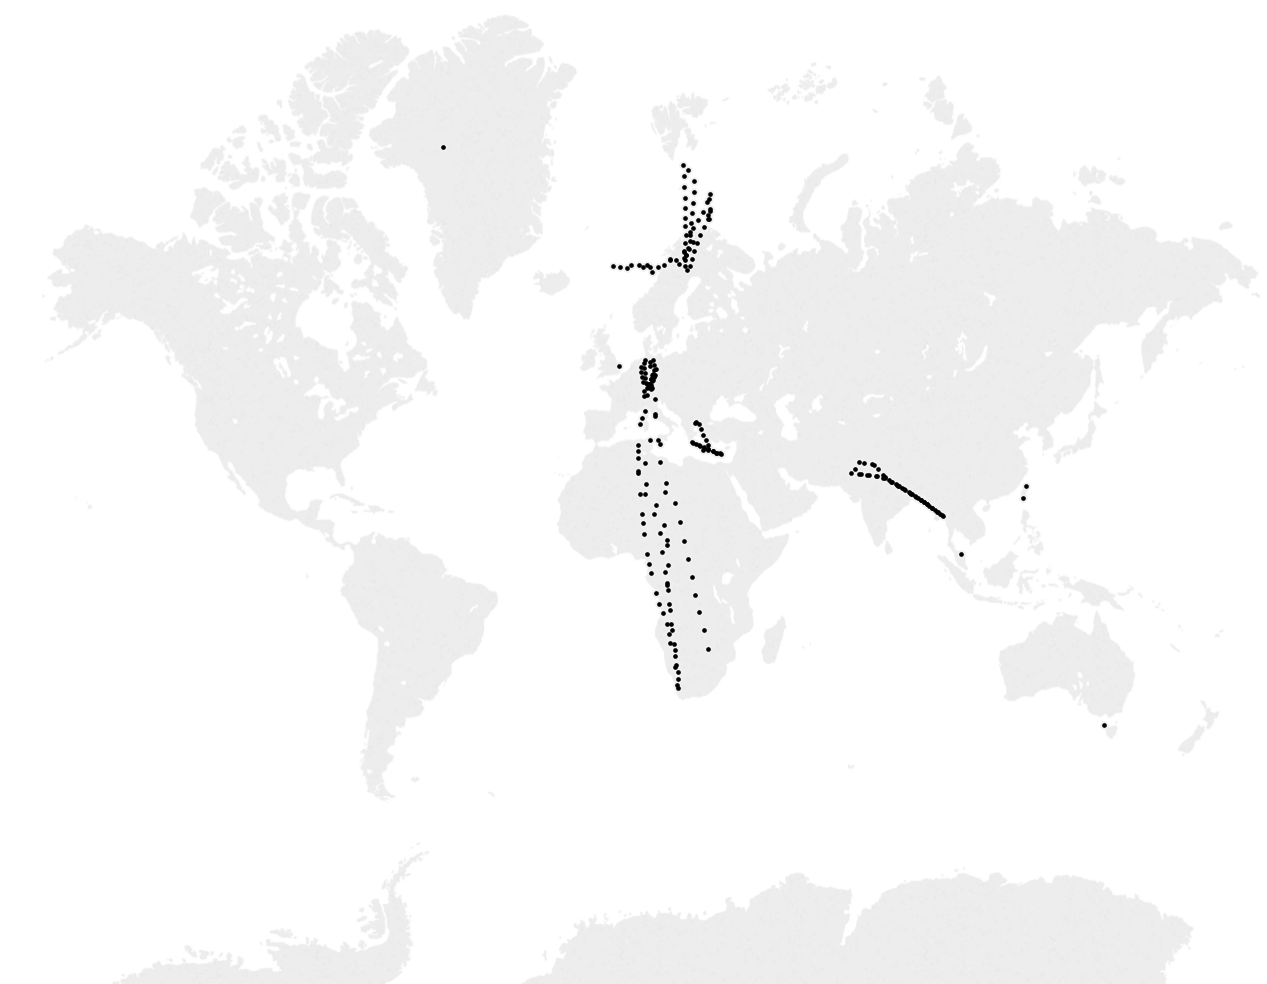
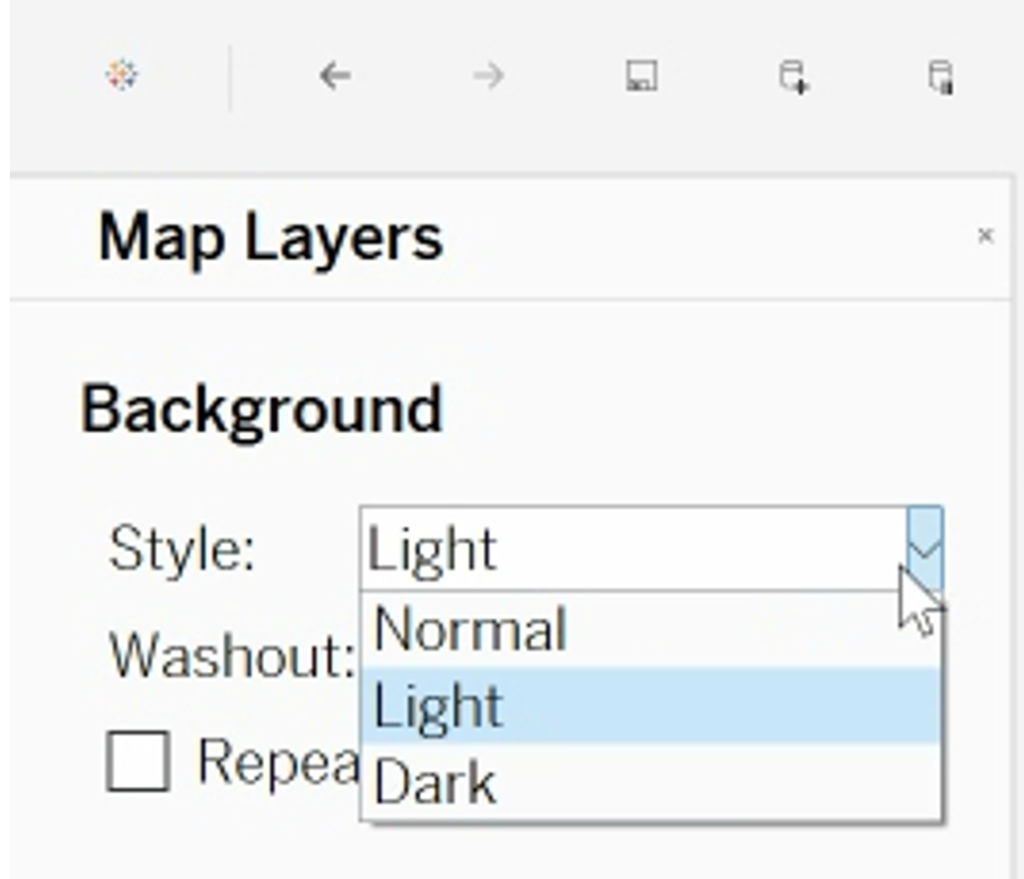
It is also possible to change the Map Style, there are three options: Normal, Light and Dark.
The map can be zoomed in and out using the buttons in the top left hand corner. Also, the map can be copied by right clicking on the map and then choosing Copy Image… from the dropdown list.